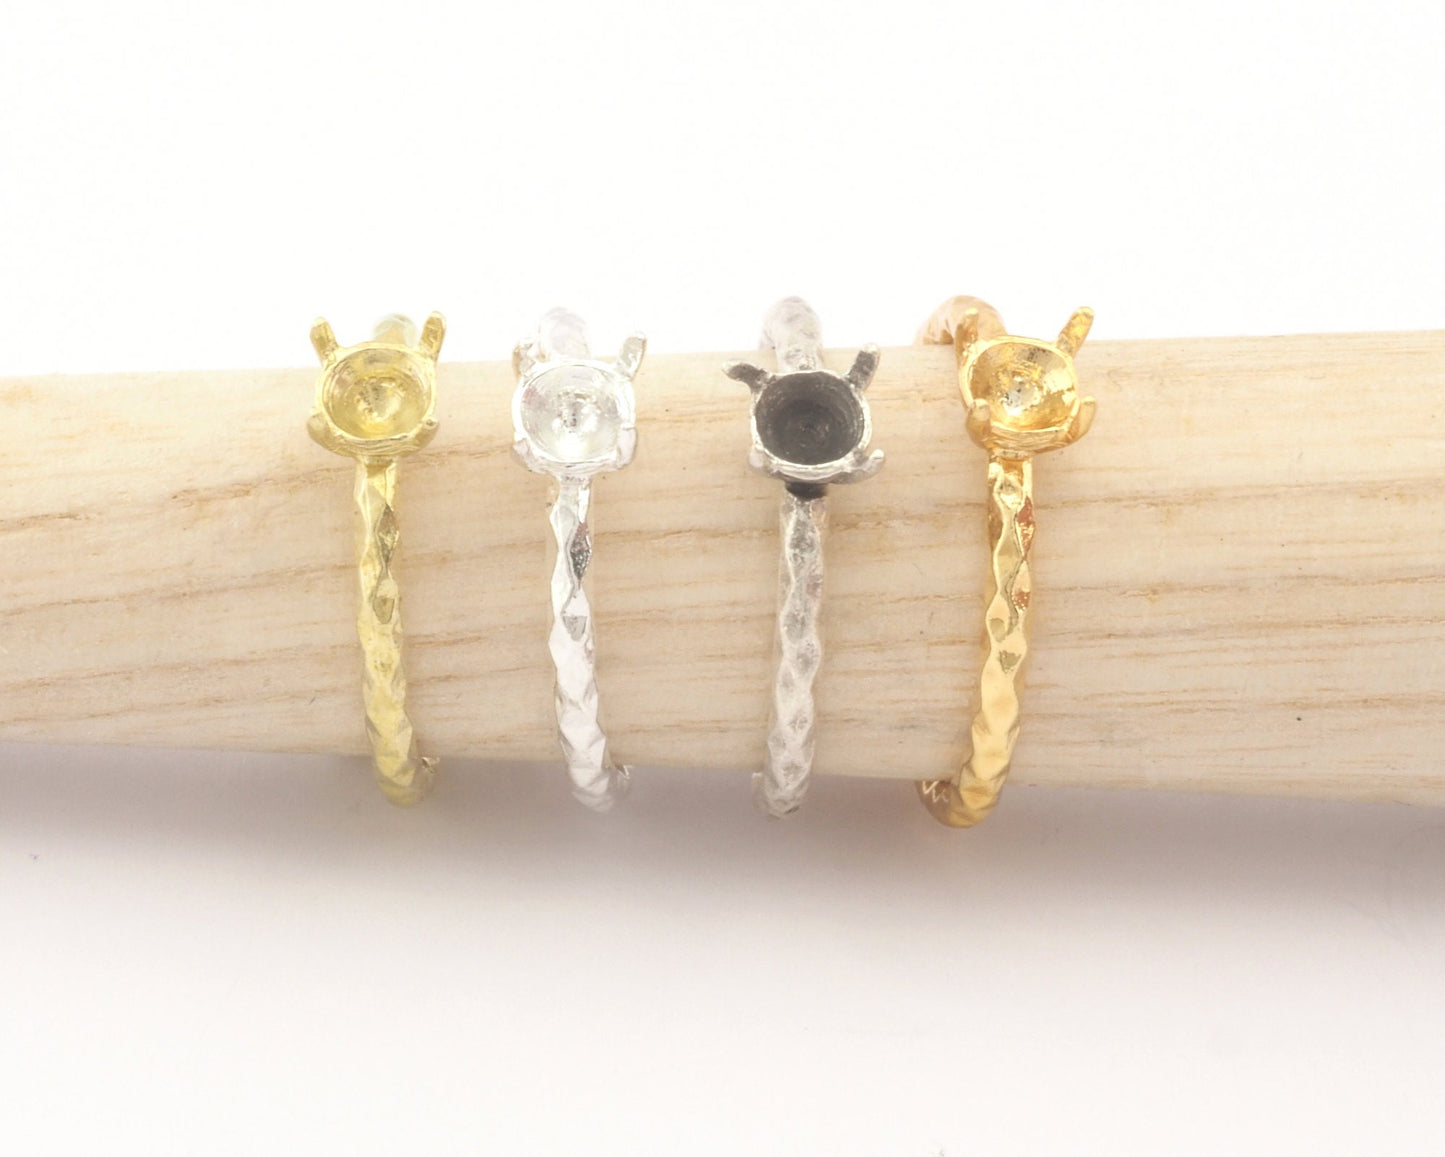
Round ring base blank cup prong bezel Raw brass-antique silver-shiny silver -shiny gold plated (6.5-10US inner size - Adjustable ) 4284
Round ring base blank cup prong bezel Raw brass-antique silver-shiny silver -shiny gold plated (6.5-10US inner size - Adjustable ) 4284
Shape: Hammered cup ring
Setting size : SS24 5.27-5.44mm
material: brass antique silver plated
Color : antique silver
Ring inner size : 6.5-10US Adjustable 16-20mm
If you want any different design and dimension please convo me,
Would you like to see our other products like this?
Would you like to see rhinestones for this rings?
Setting a blank ring refers to the process of mounting a gemstone or other decorative element into a ring setting that doesn't yet have a stone. This allows you to create a customized piece of jewelry by choosing your own gemstone or design element to complete the ring. Here's a general guide on how to set a blank ring:
**Materials and Tools:**
- Blank ring setting (pre-made or custom)
- Gemstone or design element of your choice
- Jewelers' epoxy or adhesive
- Prong pusher or pliers (if using a prong setting)
- Bezel pusher or burnisher (if using a bezel setting)
- Soft cloth or tissue
- Measuring tools (optional)
**Steps:**
1. **Choose the Setting and Gemstone:**
- Select a blank ring setting that matches your design and size preferences. Blank settings come in various styles, such as prong settings, bezel settings, or even more intricate designs.
- Choose a gemstone or design element that fits the setting. Consider factors like size, shape, and color to ensure a proper fit.
2. **Prepare the Setting:**
- Ensure that the setting is clean and free of any dust, debris, or oils that may affect the adhesion of the adhesive.
3. **Inspect the Gemstone:**
- Examine the gemstone to make sure it's clean and free of any imperfections that might affect the final appearance of the piece.
4. **Apply Adhesive:**
- Depending on the type of setting, apply a small amount of jewelers' epoxy or adhesive to the setting where the gemstone will be placed. Be sure to follow the manufacturer's instructions for the specific adhesive you're using.
5. **Position the Gemstone:**
- Carefully place the gemstone into the setting, making sure it's centered and positioned as desired. If you're using a prong setting, make sure the prongs are in contact with the stone.
6. **Secure the Gemstone:**
- If you're using a prong setting, use a prong pusher or pliers to gently push the prongs over the gemstone. This secures the stone in place.
- If you're using a bezel setting, use a bezel pusher or burnisher to carefully push the metal edges of the bezel over the gemstone, creating a secure border.
7. **Clean Excess Adhesive:**
- Check for any excess adhesive that may have squeezed out from under the gemstone. Use a soft cloth or tissue to carefully wipe away any excess glue.
8. **Let the Adhesive Cure:**
- Follow the curing time recommended by the adhesive manufacturer. It's essential to let the adhesive fully cure to ensure a secure and long-lasting bond.
9. **Inspect and Polish:**
- Once the adhesive has cured, inspect the ring to ensure the gemstone is securely set and that there are no visible adhesive residues.
- Polish the ring as needed to remove any fingerprints or smudges.
10. **Wear and Enjoy:**
- Your customized ring with the newly set gemstone is now ready to be worn and enjoyed. It's a unique piece of jewelry that you've created to match your style and preferences.
Setting a blank ring with your chosen gemstone or design element allows you to create a one-of-a-kind piece of jewelry. Whether you're setting a precious gemstone or a unique design element, the process involves careful attention to detail to ensure a secure and visually appealing result.
Product features
Product features
Materials and care
Materials and care
Merchandising tips
Merchandising tips
Share


